7.1 Setting configuration options within the MyID Client for Windows
To set the configuration options:
-
Select the Configuration option.
The configuration screen appears.
-
Scroll to the appropriate section and set the relevant options.
Note: Your administration may have restricted your ability to change some or all of your configuration options.
-
Click Apply Changes.
To revert to the previous settings, click Revert Changes.
To go back without making any changes, click Back.
7.1.1 Administrator-configured options
Your administrator may have set up a configuration override file that provides default values or prevents you from changing values; see section 7.2, Setting up an administrator configuration override file.
The MyID Client for Windows displays icons next to the option fields for administrator-configured options:
|
Icon |
Description |
|---|---|
|
|
The value was provided by an administrator configuration override file. |
|
|
The value was provided by an administrator configuration override file, and the current value is different from the administrator-provided value; click the icon to revert to the administrator-configured value. |


7.1.2 Setting communication options
To set the communication options:
-
Select the Configuration option.

-
In the Communication section, set the following options:
-
Server Address – type the address of the MyID web services server.
For example:
https://myid.example.com
Note: You must start the server address with https://
-
Client ID – optionally, type a unique identifier that the MyID Client for Windows uses to identify itself to the server.
You can capture this information in the audit to determine which workstation originated a request. See the Logging the client IP address and identifier section in the Administration Guide for details.
-
Culture (IETF Language Tag) – provide an IETF language tag (for example, en-US) that overrides the default behavior of using the language culture setting of the operating system; for example, you may have a UK English system but want to display the MyID Client for Windows interface in US English.
-
-
Click Apply Changes.

Note: For these settings to take effect, you must restart the MyID Client for Windows.
7.1.3 Setting authentication options
To set the authentication options:
-
Select the Configuration option.

-
In the Authentication section, set the following options:
-
Username – optionally, type the username you want to the MyID Client for Windows to use each time you start it up.
-
Enable 'Remember Me' – select this option to allow users to store their username between sessions.
-
-
Click Apply Changes.

Note: For these settings to take effect, you must restart the MyID Client for Windows.
7.1.4 Setting logging options
To set the logging options:
-
Select the Configuration option.

-
In the Logging section, set the following options:
-
Enable Log File – select this option to enable logging.
-
Verbose Web Service Logging – select this option to log all network communication with MyID. You are recommended to use this only for diagnostics, as it may result in sensitive information being included in the logs.
-
Log File Location – type the location to which you want to write the log file.
-
Smart Card log file location – type the location to which you want to write the smart card log file.
Smart card log events are stored separately from general log events.
-
In-Memory Log Retention Duration (Minutes) – type the number of minutes of log entries to retain in memory. This log is used for just-in-time error reports. After the configured number of minutes, log events are discarded. By default, reports contain the last 30 minutes of log entries.
-
-
Click Apply Changes.

You can also generate a just-in-time log when an error occurs; this does not require logging to be enabled, but is always available.
To generate a just-in-time error report:
-
Carry out an operation that generates an error.

-
Click Generate Error Report.
-
Select the folder into which you want to write the report, then click Open.
-
Click OK.

7.1.5 Setting accessibility options
You can set the page timeout for the MyID Client for Windows screens. The page timeout is used for security reasons; for example, when setting a new PIN for your device. You may want to increase the timeout value if, for example, you are using a screen reader that increases the time it takes to use the screen.
To change the page timeout:
-
Select the Configuration option.

-
In the Accessibility section, set the following option:
-
Page Timeout – type the number of seconds that you want to allow before the page times out.
-
-
Click Apply Changes.

7.1.6 Setting advanced options
You can set advanced configuration options for which there is no dedicated field on the configuration screen.
For example, if you are using a version of MyID CMS earlier than 12.11, you must set the UseLegacySsaPlatform configuration option to true to allow the MyID Client for Windows to impersonate the Self-Service App and be recognized by the server.
To set a custom configuration option:
-
Select the Configuration option.
-
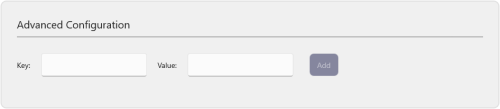
In the Advanced Configuration section, type a Key and a Value for the option.
For example:
-
Key – UseLegacySsaPlatform
-
Value – true
-
-
Click Add.
-
Click Apply Changes.

7.1.6.1 Advanced configuration options
The following advanced configuration options are available:
|
Option |
Description |
|---|---|
|
UseLegacySsaPlatform |
If you are using a version of MyID CMS earlier than 12.11, you must set the UseLegacySsaPlatform configuration option to true to allow the MyID Client to impersonate the Self-Service App and be recognized by the server. |
|
UseLegacyPassphraseCollection |
If you are using a version of MyID CMS earlier than 12.12, you must set the UseLegacyPassphraseCollection configuration option to true allow the MyID Client to use the old web-service endpoint; if you set this configuration option, support for authentication using external identity providers is disabled. |
|
CardPickerHeaderPrecedence |
When displaying devices for selection, the MyID Client tries to use the most recognizable information available as the header for the device in the list. By default, the precedence is:
If you want to change this precedence, set the CardPickerHeaderPrecedence option to a semi-colon delimited list of the options in your preferred order.
For example:
|